

Welcome to our comprehensive guide to creating delicious and nutritious kefir recipes! Whether you’re a seasoned kefir enthusiast or just starting to explore the world of fermented beverages, we’ve got you covered.
In this article, we’ll delve into four different kefir recipes that are not only easy to make but also packed with health benefits. From tangy fruit-infused variations to savory options, you’ll find something to tantalize your taste buds and boost your well-being.
Different Kefir Recipes To Try At Home
Here, you will get the 4 Different Kefir Recipes you can try at home and easily make delicious food.
Water Kefir Gummies
Ingredients for Water Kefir Gummies:
- 1 cup of water kefir grains
- 4 cups of fruit juice (choose your favorite flavor)
- 1/4 cup of unflavored gelatin
- Optional: honey or sugar for added sweetness (as per taste)
- Gummy molds or an ice cube tray
Instructions to Make Water Kefir Gummies:
- Start by brewing 4 cups of your preferred fruit juice. Wait until the juice is cool enough to drink.
- In a saucepan, sprinkle the unflavored gelatin over 1 cup of the cooled fruit juice. The gelatin needs 5 minutes to bloom, so let it sit.
- Warm the gelatin and fruit juice mixture over low heat, stirring continuously until the gelatin completely dissolves. Ensure the mixture does not boil.
- Remove the saucepan from the heat and add the remaining 3 cups of fruit juice, stirring thoroughly to combine.
- Add the water kefir grains to the mixture, gently stirring to incorporate them evenly.
- Allow the mixture to sit for 10-15 minutes to infuse the flavors.
- Strain out the water kefir grains using a fine-mesh sieve, ensuring the liquid is smooth and free of any solid particles.
- If desired, add honey or sugar to sweeten the mixture to your taste preference.
- Pour the liquid into gummy molds or an ice cube tray, filling each mold to the top.
- Refrigerate the molds for at least 2-3 hours, or until the gummies are firm and set.
- Once the gummies have solidified, remove them from the molds and store them in an airtight container in the refrigerator.
- Enjoy your homemade water kefir gummies as a healthy and delicious snack or treat!
Also Read: How to Make Kombucha
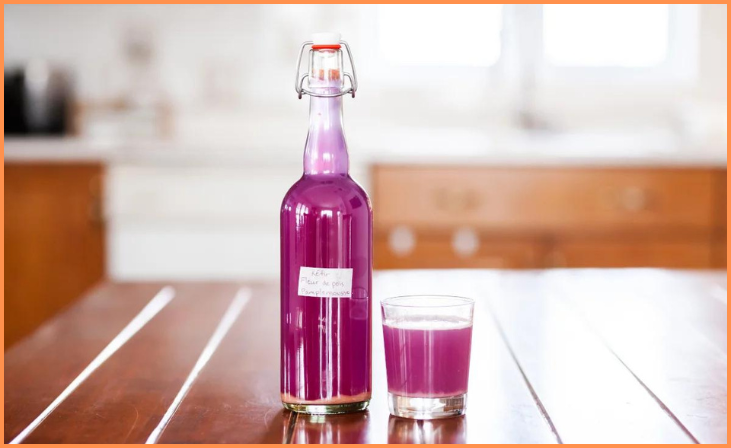
Grapefruit Water Kefir
Ingredients for Grapefruit Water Kefir:
- 1/4 cup of water kefir grains
- 1/4 cup of organic cane sugar
- 4 cups of filtered water
- 1-2 fresh grapefruits, juiced
- 1-2 slices of fresh grapefruit for garnish (optional)
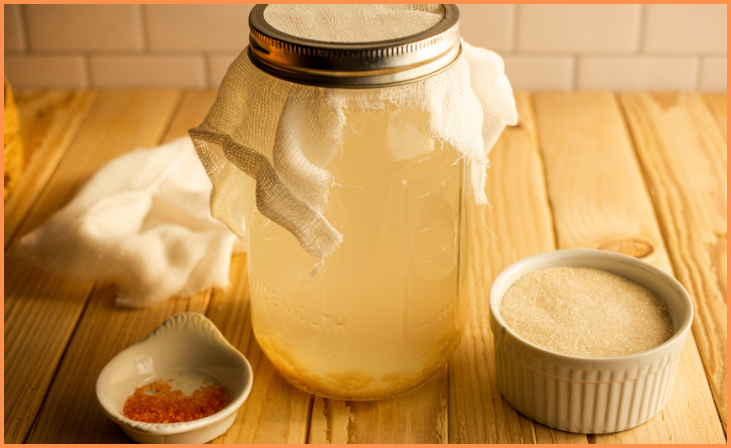
Instructions to Make Grapefruit Water Kefir:
- Begin by dissolving the organic cane sugar in the filtered water in a large glass jar or container.
- Add the water kefir grains to the sweetened water, gently stirring to ensure they are fully submerged.
- Place a cloth or paper towel that lets air pass over the jar, and use a rubber band to hold it in place. Let the mixture ferment at room temperature for 24-48 hours, depending on your desired level of fermentation and taste preference.
- After fermentation, remove the water kefir grains from the jar using a non-metal strainer. Set the grains aside for future use.
- Pour the freshly squeezed grapefruit juice into the fermented water kefir, stirring gently to combine.
- If desired, add a slice or two of fresh grapefruit to enhance the flavor and presentation of the kefir.
- Allow the grapefruit water kefir to sit for an additional 2-4 hours to infuse the grapefruit flavor.
- Once the desired flavor is achieved, refrigerate the grapefruit water kefir for a few hours to chill and enhance its refreshing taste.
- Serve the chilled grapefruit water kefir in glasses with ice and a slice of grapefruit for garnish, if desired.
- Enjoy the tangy and refreshing flavors of homemade grapefruit water kefir, a perfect beverage for a hot summer day or any time you crave a healthy and invigorating drink.
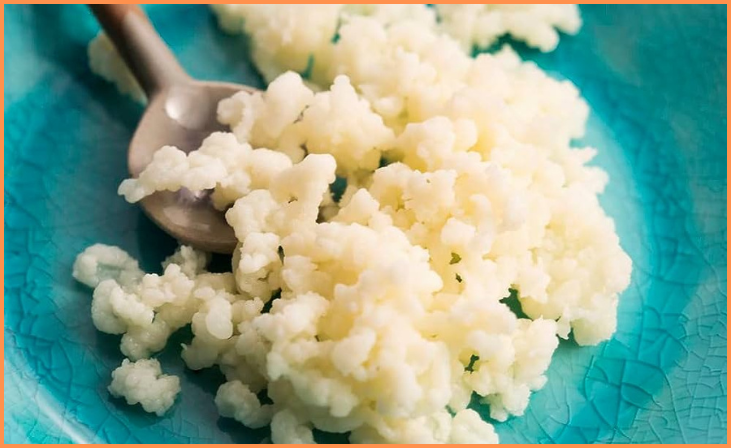
Milk Kefir
Ingredients for Making Milk Kefir:
- 2 tablespoons of milk kefir grains
- 2 cups of milk (whole milk, 2%, or skim milk, depending on your preference)
- A glass jar or container with a lid
- A non-metal stirring utensil (plastic or wooden)
- A paper towel or rag that lets air pass through and a rubber band
Instructions for Making Milk Kefir:
- Place the milk kefir grains into a clean glass jar.
- Pour the milk over the kefir grains in the jar, leaving some space at the top (about an inch or so).
- Gently stir the milk and kefir grains together using a non-metal stirring utensil.
- Place a cloth or paper towel that lets air pass over the jar, and use a rubber band to hold it in place. This allows air to flow while keeping contaminants out.
- Allow the jar to sit at room temperature, away from direct sunlight, for about 24-48 hours. The fermentation time may vary based on room temperature and personal preference. The longer it ferments, the tangier it will become.
- During the fermentation process, you may notice the milk thickening and small curds forming. This is a sign that the kefir is working.
- After the desired fermentation period, remove the cloth or paper towel and gently strain out the kefir grains using a non-metal strainer. You can transfer the grains to a new batch of milk for your next fermentation.
- The liquid in the jar is now your homemade milk kefir, and it’s ready to enjoy.
- You can drink the milk kefir as is or refrigerate it for a few hours to chill. It may separate into whey and curds, so you can shake or stir it before serving.
- You can flavor your milk kefir by adding fruits, honey, or other ingredients according to your taste preferences.
- Enjoy the rich and creamy taste of homemade milk kefir, packed with probiotics and nutritional benefits. It can be consumed on its own, added to smoothies, or used in various recipes.
Also Read: Different Kombucha Recipes
Chocolate Coconut Kefir Smoothie

Ingredients for Chocolate Coconut Kefir Smoothie:
- 1 cup of milk kefir
- 1 ripe banana
- 2 tablespoons of unsweetened cocoa powder
- 2 tablespoons of shredded coconut
- 1 tablespoon of honey or maple syrup (optional, depending on sweetness preference)
- 1/2 teaspoon of vanilla extract
- A handful of ice cubes
Instructions to Make Chocolate Coconut Kefir Smoothie:
- In a blender, combine the milk kefir, ripe banana, unsweetened cocoa powder, shredded coconut, honey or maple syrup (if using), and vanilla extract.
- By adding a few ice cubes to the blender, you can make a cool shake.
- Blend the ingredients on high speed until the mixture is smooth and creamy, ensuring the ingredients are well combined.
- If the smoothie is too thick, you can add a little more milk kefir or water to achieve your desired consistency.
- If you think the drink is too sweet, you can add more honey or maple syrup.
- Once the smoothie reaches your desired taste and consistency, pour it into a tall glass or jar.
- Optionally, garnish the smoothie with a sprinkle of shredded coconut or a dusting of cocoa powder.
- Serve the delicious and nutritious chocolate coconut kefir smoothie immediately for a satisfying and refreshing treat.
- Enjoy the rich and creamy blend of chocolate and coconut flavors combined with the probiotic benefits of kefir for a nourishing and indulgent beverage.
Conclusion
By incorporating these diverse kefir recipes into your diet, you can introduce a delightful twist to your daily nutrition while reaping the myriad benefits of this superfood. Experiment with the flavors, get creative with the ingredients, and embark on a journey to better health with these simple yet versatile kefir recipes. So, go ahead and treat your taste buds while nourishing your body with these wholesome and refreshing beverages.
FAQs
Kefir is a fermented milk drink that is rich in probiotics, vitamins, and minerals. Its consumption is linked to improved digestion, strengthened immune function, and enhanced gut health.
Yes, kefir can be consumed by individuals with lactose intolerance. This process breaks down lactose, which makes it easier to digest. Additionally, non-dairy alternatives like coconut or almond milk can be used in kefir recipes for those who are lactose intolerant.