
Welcome to a journey of culinary exploration where traditional methods meet modern taste sensations. In the realm of fermented delights, we often think of pickles and kimchi, but have you ever considered transforming a summer favorite into a probiotic powerhouse? Enter the world of fermented corn on the cob—a unique twist on a classic that not only preserves the essence of sweet, juicy corn but elevates it to new heights of flavor complexity.
In this blog, we’ll delve into the art and science of fermenting corn on the cob, unraveling the mysteries behind this age-old preservation technique. Fermentation not only imparts a tangy kick to the natural sweetness of corn but also introduces a wealth of probiotics, making it a wholesome addition to your culinary repertoire.
Whether you’re a seasoned fermenter or a curious kitchen enthusiast, join us as we demystify the process, share tips and tricks, and explore the endless possibilities that fermented corn on the cob brings to your table. Get ready to embark on a flavorful journey that celebrates tradition, innovation, and the joy of crafting your own culinary masterpieces.
Why Ferment Corn?
Fermentation is a traditional preservation method that not only extends the shelf life of food but also imparts unique flavors and textures. When applied to corn on the cob, fermentation introduces beneficial bacteria that not only enhance the taste but also contribute to gut health.
Ingredients:
- Fresh corn on the cob
- Water
- Sea salt
- Optional: herbs and spices for flavor
Equipment:
- Large bowl
- Fermentation weights
- Mason jars
- Cheesecloth or coffee filter
- Rubber bands or string
Instructions:
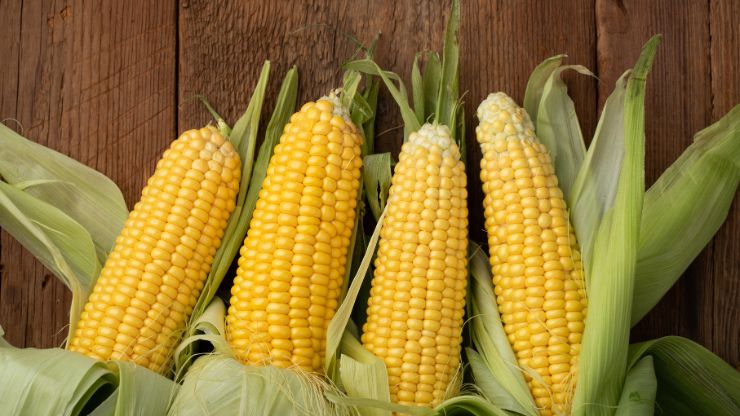
Step 1: Selecting Fresh Corn
The foundation of exceptional fermented corn on the cob lies in the selection of fresh, high-quality corn. When embarking on this culinary journey, opt for ears with vibrant green husks and plump, tightly-packed kernels. Seek out locally sourced or in-season corn for optimal flavor.
The freshness of the corn not only enhances the taste but also ensures a more successful fermentation process. By paying attention to the quality of the corn, you set the stage for a delightful and wholesome fermented corn experience, where each kernel reflects the essence of the season and contributes to the overall success of your culinary endeavor.
For More- Step-by-step Fermented Foods Recipes for Health
Step 2: Shucking and Cleaning
Once you’ve selected the freshest ears of corn, the next crucial step in crafting exquisite fermented corn on the cob is the meticulous process of shucking and cleaning. Begin by removing the husks and silks from each ear, revealing the raw beauty of the corn kernels. Take the time to rinse the ears thoroughly under cold water, ensuring the removal of any residual silks and debris.
This careful shucking and cleaning process not only enhances the aesthetic appeal of the corn but also sets the stage for a pristine fermentation environment. As you peel away the layers, you’re not just uncovering the potential of each ear; you’re also laying the groundwork for a flavorful and visually appealing end result.
Step 3: Cutting the Corn
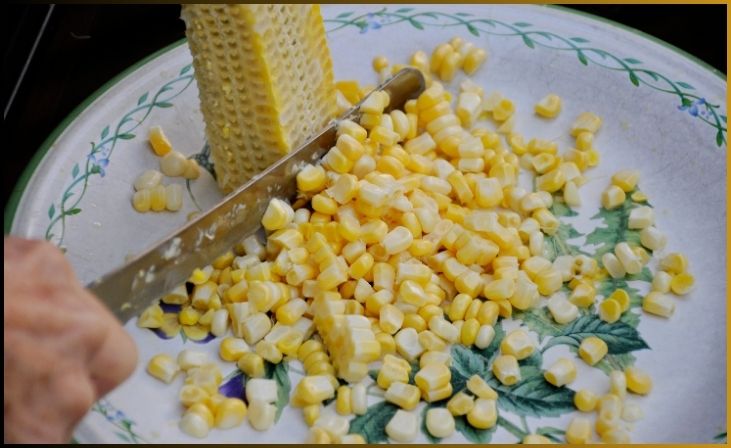
With the freshly shucked and cleaned corn on the cob, it’s time to embark on the third step: cutting the corn. Armed with a sharp knife, position the corn cob upright on a stable cutting board. Begin the liberating process by slicing downward, expertly separating the kernels from their cob confinement. The goal is to achieve bite-sized pieces, ensuring that each cut captures the essence of the succulent kernels.
This step not only facilitates the fermentation process but also transforms the corn into more manageable, delectable portions. As the knife glides through, releasing the vibrant and juicy kernels, you’re one step closer to unlocking the full potential of your fermented corn on the cob, where each piece contributes to a harmonious and flavorful culinary symphony.
Step 4: Preparing the Brine
Having liberated the corn kernels, the next pivotal step is crafting the essence of fermentation: preparing the brine. In a large bowl, embark on this transformative journey by dissolving sea salt in water. The brine serves as the alchemical solution that will envelop each kernel, imparting flavor, and kickstarting the fermentation magic. Strive for the perfect balance, as the salt dissolves into the water, creating a harmonious concoction that will elevate the corn to new taste dimensions.
This crucial step not only seasons the corn but also initiates the microbial dance that will define the character of your fermented creation. As you stir and dissolve, envision the alchemy of flavors taking shape, setting the stage for a culinary symphony where every kernel harmonizes with the transformative powers of fermentation.
Step 5: Adding Flavor (Optional)
In the pursuit of fermented corn perfection, the fifth step invites you to infuse artistry into your culinary creation by adding optional flavors. This is the stage where creativity takes center stage, allowing you to tailor the taste of your corn to suit your unique preferences. Consider introducing a medley of herbs and spices to the brine, such as thyme, garlic, or chili flakes, creating a tapestry of flavors that will weave through each kernel during the fermentation process.
Experimentation is not only encouraged but celebrated at this juncture, as you explore and discover the ideal combination that resonates with your palate. This optional flavor infusion transforms the fermented corn into a bespoke masterpiece, where every bite reflects your culinary vision, adding an extra layer of depth to the symphony of tastes that will unfold during fermentation.
Step 6: Packing the Jars
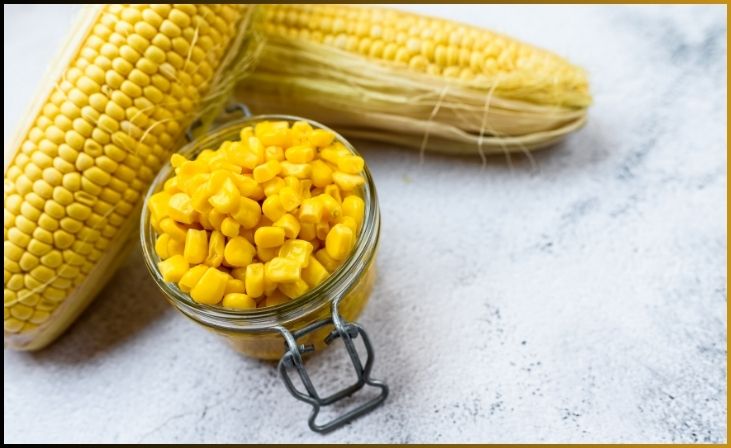
With the flavors infused and the brine prepared, the sixth step invites you to orchestrate corn elegance within the confines of glass jars. Take each Mason jar and gracefully pack them with the freshly cut and seasoned corn kernels. As you fill the jars, pay attention to leaving a bit of breathing room at the top, allowing the kernels space to mingle and dance in the upcoming fermentation ballet.
Press the corn down firmly, ensuring that air pockets vanish, creating a harmonious environment within each jar. The transformation from individual kernels to a collective masterpiece unfolds as the jars are meticulously filled, setting the stage for a fermentation symphony that will imbue each kernel with the artistry of flavors and the magic of preservation.
Step 7: Using Fermentation Weights
As you embark on the journey of fermenting corn on the cob, the crucial seventh step introduces a symphony of balance: using fermentation weights. These specialized tools, whether in the form of glass weights or carefully chosen clean stones, serve as anchors in the mason jars, ensuring that the corn remains submerged in the flavorful brine. Placing the weights atop the corn creates a gentle yet firm pressure, preventing any rogue kernels from floating to the surface and facilitating a more uniform fermentation process.
The weights act as silent conductors, guiding the intricate dance of microorganisms within each jar and contributing to the harmonious transformation of corn into a probiotic-rich delicacy. As you delicately position these weights, envision them as the guardians of the fermentation process, orchestrating a masterpiece that will unfold within the confines of each glass jar.
Step 8: Covering with Cloth
In the eighth step of crafting your fermented corn symphony, it’s time to let nature play its part by covering the jars with cloth. Embrace the simplicity of this act, choosing a piece of cheesecloth or a coffee filter to gently drape over the mouth of each jar. Secure the covering with rubber bands or string, creating a protective yet breathable barrier.
This step is akin to setting the stage for a ballet, allowing the microbial dancers to twirl and pirouette gracefully without obstruction. The cloth serves as a conduit for air exchange, letting the fermentation process unfold in a symbiotic dance between corn and microorganisms. As the corn undergoes its magical transformation within the jars, the covering acts as a guardian, ensuring a harmonious blend of flavors and textures.
Step 9: Fermentation Time
Once the corn is nestled in its briny bath and covered with a protective cloth, it’s time to usher in the enchanting phase of fermentation. The jars, now positioned in a cool, dark sanctuary, become the stage for a microbial ballet. Over the course of 5 to 7 days, the magic unfolds as beneficial bacteria waltz through the kernels, transforming them into a tangy, probiotic-rich delight.
This fermentation time is akin to nurturing a symphony, with each passing day adding another layer of complexity and depth to the flavor profile. As you wait in anticipation, nature orchestrates the harmonious transformation of your corn into a culinary masterpiece.
Step 10: Taste Testing
As the designated fermentation period concludes, it’s time to embark on a sensory journey with the crucial step of taste testing. Gently open a jar and, with eager anticipation, sample the fermented corn. Assess its tanginess and flavor, determining if it aligns with your palate preferences. This step offers a moment of culinary revelation, as you savor the nuanced transformation that has taken place within the humble corn kernels.
If the tanginess meets your satisfaction, proceed to the final act; transfer the jars to the refrigerator. This not only halts the fermentation process but also preserves your probiotic-rich creation for prolonged enjoyment.
Tips and Tricks
- Hygiene Matters: Ensure that all equipment and utensils are clean and sanitized to prevent unwanted bacteria from contaminating your ferment.
- Temperature Control: Fermentation speeds up in warmer temperatures. If you want a slower fermentation process, keep the jars in a cooler environment.
- Experiment with Flavors: Don’t be afraid to experiment with different herbs and spices to create unique flavor profiles. Some people enjoy adding a touch of sweetness with a dash of honey or maple syrup.
- Safety First: If at any point during the fermentation process you notice an off-putting odor or mold, it’s best to discard the batch and start fresh. Fermentation should have a pleasant, sour smell.
Also Read- 10 Delicious Homemade Fermented Foods Recipes to Try
Conclusion
In the realm of fermentation, crafting corn on the cob transforms a humble vegetable into a symphony of probiotic-rich delights. From the meticulous selection of fresh corn to the orchestration of brine and optional flavor infusions, each step is a dance with nature, culminating in a masterpiece. The fermentation process, a microbial ballet in cool darkness, imbues the corn with tanginess and depth. Taste-testing becomes a moment of culinary revelation, and refrigeration preserves the probiotic goodness. With each jar, you’ve not only made fermented corn but unraveled the culinary alchemy within its kernels.
FAQs
Typically, fermenting corn on the cob takes around 5 to 7 days. However, factors like temperature and personal taste preferences can influence the duration.
Absolutely! Adding herbs and spices during the optional flavor infusion step allows for creative expression. Experiment with various combinations to tailor the flavor to your liking.
Taste-testing is key. Once the corn reaches your desired level of tanginess, transfer the jars to the refrigerator. This slows down fermentation and extends the shelf life.
Sea salt is commonly recommended for its natural minerals and balanced flavor. However, non-iodized salt without additives can also be suitable.