

Fermentation, a time-honored and entirely natural process, has been integral to human civilization for centuries. It’s a remarkable alchemy that transforms humble raw ingredients into a diverse array of delectable and nutritionally rich products. This transformative journey encompasses a myriad of consumables, ranging from the staple comforts of bread and beer to the exotic delights of yogurt and kimchi. In this article, we embark on an illuminating voyage through the intricate stages of fermentation. Our aim is to cast a radiant spotlight on the indispensable processes that underpin this ancient art, which empowers us to turn the simplest of components into a world of culinary wonders.
Understanding Fermentation
Fermentation, a fundamental biological process, stands as a testament to the remarkable workings of nature. At its core, it involves the intricate breakdown of complex substances into simpler ones, all orchestrated by the unseen but vital hand of microorganisms. This enchanting transformation lies at the heart of producing a vast array of beloved foods and beverages.
Fermentation, in essence, can be likened to a culinary and scientific dance. It’s a process by which microorganisms, operating in their microscopic kingdoms, commence a symphony of chemical reactions. The magic begins as they harness the energy of organic matter and sugars, expertly converting these compounds into alcohol, acids, or gases. These newly formed components infuse the final product with their unique flavors and textures, creating the signature characteristics that aficionados of fermented goods hold dear.
Also Read:- Lactose Intolerance and Lacto fermentation
The Role of Microorganisms

In this symphony of fermentation, microorganisms take center stage. These minuscule powerhouses, including bacteria, yeast, and molds, are the unsung heroes behind this culinary alchemy. With unwavering dedication, they toil behind the scenes, often invisible to the naked eye but profoundly impacting the world of gastronomy.
Bacteria, with their diverse strains and capabilities, often wield their enzymatic prowess to metabolize sugars, yielding acids that bestow tartness and preservation qualities. Yeast, on the other hand, are the alchemists of alcohol production, responsible for crafting the effervescence found in beverages like beer and champagne. Molds, with their intricate spore structures, leave their indelible mark on products like blue cheese, offering distinct flavors and textures.
Stages Of Fermentation
Stage 1: Inoculation
In the enthralling journey of fermentation, the very first act is known as “Inoculation.” This initial stage sets the wheels of transformation in motion. Inoculation involves the introduction of a small quantity of the desired microorganism into the raw material. Think of it as the conductor’s baton signaling the start of the symphony.
Consider the art of breadmaking, a tradition dating back millennia. In this context, the magic begins when yeast is gently added to a mixture of flour and water. This humble introduction of yeast initiates a lively and vibrant fermentation process, unleashing a cascade of reactions that will ultimately give rise to the tantalizing aroma and texture of freshly baked bread.
Stage 2: Fermentation Proper
The second act, aptly named “Fermentation Proper,” is where the true enchantment occurs. This is the heart of the matter, the stage where microorganisms work their wonders. Their mission? To consume the sugars present in the raw material and work their metabolic alchemy.
As these microorganisms devour the sugars, they yield a symphony of byproducts. In the world of beer, they produce alcohol, imparting that satisfying buzz. In bread, they generate carbon dioxide, causing the dough to rise and take on its airy and delicate structure. In dairy products like yogurt and cheese, lactic acid is born, giving these creations their unique tang and creaminess. This stage is the crucible in which the characteristic flavors and textures of the final product are shaped, making each fermentation process a magical and culinary masterpiece.
Stage 3: Maturation
After the crescendo of the fermentation proper, the third act, “Maturation,” takes the stage. Some products, in their quest for perfection, require this period of maturation. It’s a time of waiting and anticipation, during which flavors deepen and textures evolve.
A prime example can be found in the world of cheese. Many types of cheese, such as cheddar or gouda, require aging to achieve their peak flavor profiles. During this period, the cheese rests, allowing its flavors to harmonize and develop into the rich and complex notes that cheese connoisseurs cherish. It’s a testament to the patience and artistry that fermentation artisans employ in their craft.
Also Read:- Preserving the Harvest for Winter
7 Key Health Benefits Of Fermentation
1. Enhanced Nutrient Bioavailability
Fermentation enhances the bioavailability of nutrients in foods. During the process, beneficial microorganisms break down complex compounds, making essential vitamins and minerals more accessible to our bodies. This means that fermented foods can offer a more potent nutritional punch.
2. Improved Digestibility
Fermentation can significantly improve the digestibility of certain foods. The enzymatic actions of microorganisms can break down complex carbohydrates and proteins, making them easier on the digestive system. This is especially beneficial for people who have sensitive stomachs.
3. Probiotic Power
Fermented foods are often rich in probiotics, which are beneficial bacteria that support gut health. Consuming probiotics can help maintain a balanced gut microbiome, which in turn can influence overall health, including the immune system and even mental well-being.
4. Reduced Allergenicity
Fermentation can reduce the allergenicity of certain foods. The breakdown of proteins during fermentation can make allergenic proteins less recognizable to the immune system, potentially reducing the risk of allergic reactions.
5. Preservation of Fresh Foods
Fermentation is an age-old method of preserving fresh foods. It can extend the shelf life of perishable ingredients, reducing food waste and ensuring access to nutritious options even in times of scarcity.
6. Enhanced Flavor and Aroma
Fermentation is a culinary art in itself. It gives rise to complex and unique flavors, making foods more interesting and enjoyable. The distinct tastes and aromas developed during fermentation can turn a simple meal into a culinary masterpiece.
7. Detoxification and Reduction of Anti-Nutrients
Fermentation can aid in detoxifying certain foods by breaking down anti-nutrients, compounds that inhibit the absorption of essential nutrients. This process can make previously restricted foods safer to consume.
Does Fermentation Increase The Nutritional Value Of Food?
Yes, fermentation can increase the nutritional value of food in several ways:-
Enhanced Nutrient Bioavailability: During the fermentation process, beneficial microorganisms break down complex compounds in food, making essential nutrients more accessible to our bodies. For example, the phytic acid found in grains and legumes can inhibit the absorption of minerals like iron and zinc. Fermentation can reduce the phytic acid content, improving mineral absorption.
Increased Vitamin Content: Some fermented foods, such as yogurt and kefir, can have higher vitamin levels than their non-fermented counterparts. For instance, the fermentation process can increase the concentration of certain B vitamins.
Probiotics: Fermented foods are often rich in probiotics, which are beneficial bacteria that support gut health. These probiotics contribute to a balanced gut microbiome, which can have a profound impact on overall health, including improved digestion and enhanced immunity.
Reduced Anti-Nutrients: Fermentation can break down anti-nutrients, compounds that hinder the absorption of essential nutrients. For example, phytates, which are anti-nutrients found in grains and legumes, can be reduced through fermentation, allowing for better nutrient utilization.
Preservation of Fresh Foods: Fermentation is an age-old method of preserving fresh foods. It can extend the shelf life of perishable ingredients, reducing food waste and ensuring access to nutritious options even in times of scarcity.
Improved Digestibility: The enzymatic actions of microorganisms during fermentation can make certain foods easier to digest. This can be particularly beneficial for individuals with sensitive stomachs.
Also Read:- How Does Alcohol Fermentation Work
What Foods Can I Ferment?
You can ferment a wide variety of foods, and the possibilities are limited only by your creativity. Here are some common foods that can be fermented:
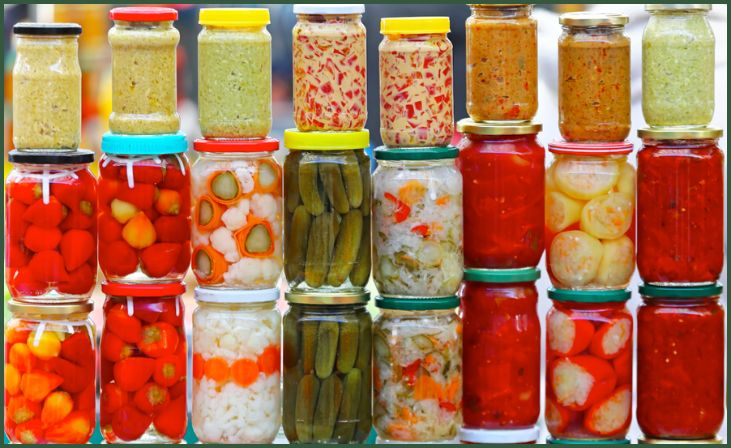
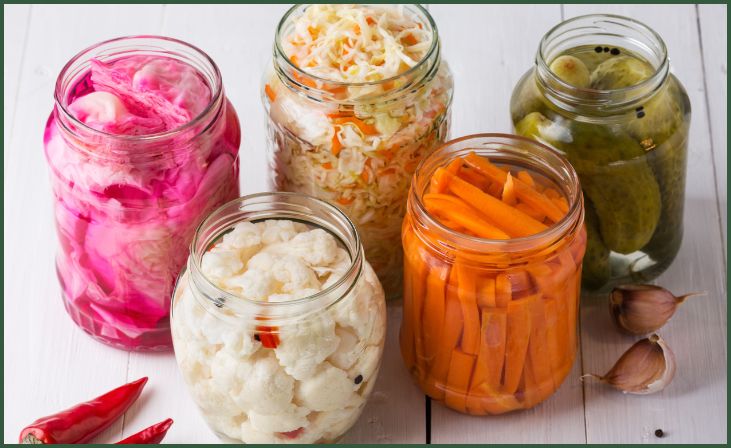
Vegetables: Vegetables like cabbage, cucumbers, carrots, and peppers are commonly fermented to make dishes like sauerkraut, pickles, and kimchi.
Dairy Products: Milk can be fermented to create yogurt, kefir, and various types of cheese like cheddar and brie.
Grains: Grains such as rice and wheat can be fermented to produce products like sourdough bread, injera, and idli.
Legumes: Soybeans are famously used to make fermented products like soy sauce, miso, and tempeh.
Beverages: Besides alcoholic drinks like beer and wine, non-alcoholic fermented beverages like kombucha and kefir are becoming increasingly popular.
Fruits: While less common, fruits can also be fermented into beverages like fruit wines and ciders.
Meats: In some cultures, meats like salami and certain types of sausages are fermented for preservation and flavor.
Condiments: Condiments like mustard, ketchup, and fish sauce are often fermented to develop unique flavors.
Grains and Pulses: Grains and pulses like barley, rice, and lentils can be used in the fermentation process to create various types of alcoholic beverages, such as beer and sake.
Tea: Tea leaves are fermented to produce pu-erh tea, a type of aged and fermented tea with a distinct flavor.
Conclusion
Throughout this article, we’ve embarked on an exhilarating journey into the mesmerizing realm of fermentation. We’ve peeled back the mystery surrounding this ancient and transformative process, delving into its various stages, exploring its significance, and providing insights into some of the questions that often pique our curiosity.
Fermentation is not merely a culinary technique; it’s a profound testament to the creativity of nature and the resourcefulness of humanity. From the age-old traditions of sourdough breadmaking, where a simple mixture of flour, water, and yeast becomes a fragrant, crusty loaf, to the contemporary fascination with kombucha and craft beer, where innovation pushes the boundaries of flavor and effervescence, fermentation remains an enduring protagonist in our culinary adventures.
Frequently Asked Questions
A: The duration of fermentation varies depending on the product. It can range from a few hours to several months, such as in the case of wine or cheese.
A: In most cases, properly fermented foods are safe to consume. However, improper fermentation can lead to contamination. It’s essential to follow best practices and guidelines.