In the realm of bread-making traditions, few delights match the rustic simplicity and versatile charm of Sourdough bannock bread. This beloved flatbread, cherished in cultures around the world, has a timeless appeal that continues to captivate both seasoned bakers and kitchen novices. While there are countless variations of bannock, our journey today focuses on a particular gem – sourdough bannock. By infusing the classic recipe with the tangy magic of sourdough, we elevate this humble bread to new heights.
In the following guide, we invite you to embark on a culinary adventure, exploring the art of creating your very own sourdough bannock. Whether you’re drawn by the allure of sourdough’s distinctive flavor or the joy of crafting bread from scratch, this recipe promises a delightful and satisfying experience. So, let’s dive into the world of sourdough bannock and savor the rich, tangy notes of tradition with each delicious bite.
Table of Contents
ToggleIngredients You’ll Need
Before you start, gather the following ingredients:
- 1 cup of sourdough starter
- 2 cups of all-purpose flour
- 1 teaspoon of salt
- 1 teaspoon of baking soda
- 1/2 cup of warm water
- 2 tablespoons of oil or fat (e.g., vegetable oil, melted butter, or lard)
Also Read- Whole Wheat Brownie Sourdough Bread
Instructions
Step 1: Prepare Your Sourdough Starter

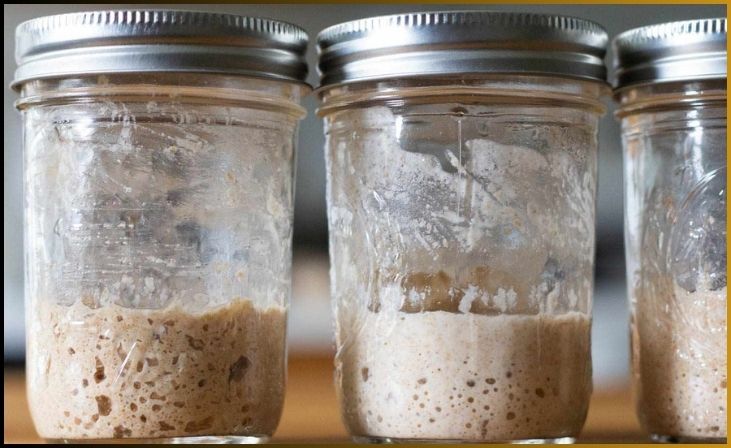
Preparing your sourdough starter is the foundational step in creating sourdough bannock bread. If you already have an active sourdough starter, ensure that it’s lively and bubbly, as this indicates a thriving colony of wild yeast and lactic acid bacteria. If you don’t possess a starter, fear not – you can easily cultivate one. Begin by mixing equal parts of all-purpose flour and water in a clean glass jar or container. Stir well and allow it to sit at room temperature, loosely covered. Over the course of a few days, this mixture will begin to ferment, developing the telltale bubbles and a slightly sour aroma.
Once your starter is lively and bubbly, it’s ready to infuse your bannock with that distinctive sourdough flavor. This active starter will not only provide the bread’s signature tang but also contribute to its leavening, making your bannock rise without the need for commercial yeast. With a vibrant sourdough starter, you’re well on your way to mastering the art of sourdough bannock.
Step 2: Mix the Ingredients
With your vibrant sourdough starter prepared, it’s time to delve into the heart of the sourdough bannock bread-making process – mixing the ingredients. In a spacious mixing bowl, combine your sourdough starter, all-purpose flour, salt, and baking soda. Gradually introduce the warm water and oil (vegetable oil, melted butter, or lard) into the mix, ensuring an even distribution of ingredients. The result should be a soft, pliable dough.
At this stage, keep in mind that the consistency of the dough is crucial, so adjust the quantity of water or flour as needed to achieve the right balance. This process sets the foundation for the development of the bread’s texture and flavor, with the sourdough starter infusing it with its characteristic tang and leavening properties. The ingredients are now harmoniously blended, and the real transformation of your bannock begins.
Step 3: Knead the Dough
The art of crafting sourdough bannock bread takes a tactile turn as you transition to the kneading stage. After combining your ingredients into a soft, pliable dough, it’s time to work the mixture to develop its gluten structure and texture. Turn the dough out onto a floured surface, like a clean countertop or cutting board, and roll up your sleeves. Knead the dough by pushing it away from you with the heel of your hand, then fold it back towards yourself.
Repeat this process for a few minutes until the dough becomes smooth and elastic. This physical interaction not only enhances the bread’s texture but also helps to evenly distribute the sourdough starter and other ingredients throughout the dough, ensuring a harmonious flavor. Kneading is a hands-on journey that connects you with the traditions of bread-making, and it’s an essential step on the path to crafting your flavorful sourdough bannock.
Step 4: Rest and Rise
With your sourdough bannock dough now kneaded to perfection, the next step is to let it rest and rise. This period of rest is where the enchanting alchemy of sourdough fermentation begins. Gently place the dough back into the mixing bowl, covering it with a clean kitchen towel or plastic wrap. During this time, usually around 30 minutes, the active sourdough starter gets to work. The dough will undergo a transformation, becoming slightly puffy and expanding in size.
Don't just scroll, subscribe!
BuzzTrail's unique web-stories are the cure for boredom you've been waiting for.
This rise is due to the wild yeast and lactic acid bacteria present in the sourdough starter, which produce carbon dioxide gas as they feed on the dough’s sugars. This natural leavening process is what gives your bannock its characteristic flavor and delicate texture. The dough’s brief respite is a crucial stage that sets the stage for the final act of creating delicious sourdough bannock.
Step 5: Preheat and Prepare the Pan
As your sourdough bannock dough is resting and rising, it’s a perfect opportunity to get your pan ready for cooking. Choose a skillet or frying pan, preferably a cast-iron one if available, and place it over medium heat. This pan will be the canvas for your bannock’s culinary artistry. There’s no need to add oil or fat to the pan at this stage.
Preheating the pan ensures that when you’re ready to cook your bannock, it will be greeted by an evenly heated surface, allowing for a consistent and beautiful golden-brown crust. A well-prepared pan is your trusty ally in the journey to create that delicious, tangy, and rustic sourdough bannock.
Step 6: Shape and Cook
With your sourdough bannock dough perfectly risen and your pan preheated, it’s time to shape and cook this delightful bread. First, take the dough and place it on a floured surface, such as a clean countertop or cutting board. Using your hands or a rolling pin, gently flatten the dough to a thickness of about 1/4 inch. The shaping of your bannock can be tailored to your preference, whether you prefer it round or rectangular.
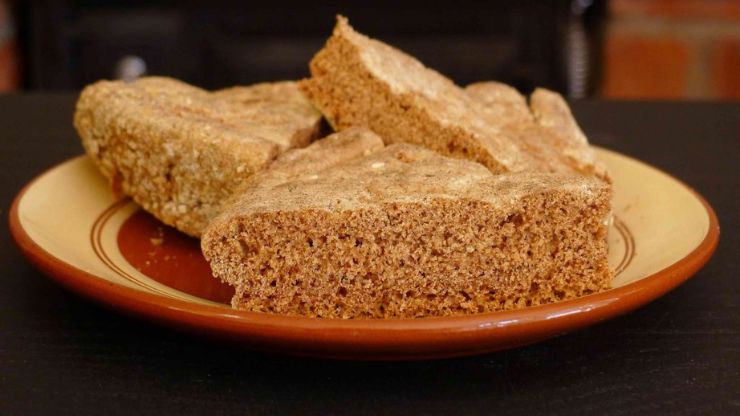
Once shaped, carefully transfer your bannock to the preheated pan. Cook it for about 3-4 minutes on each side or until it achieves a stunning golden-brown hue and a slight puffiness. As it cooks, you’ll notice the bannock transforming before your eyes, developing a rustic appearance and the irresistible scent of freshly baked bread. This stage is where the magic happens, and the sourdough starter’s tangy flavor is fully realized. When both sides of the bannock are cooked to perfection, it’s time to remove it from the pan and place it on a serving plate. Cut it into wedges or squares, and serve it warm, savoring the unique flavor of your homemade sourdough bannock.
Step 7: Serve and Enjoy
The moment you’ve been eagerly anticipating has arrived – it’s time to serve and enjoy your freshly baked sourdough bannock. After removing the bannock from the pan and placing it on a serving plate, take a moment to admire its rustic appearance and the tantalizing aroma that fills the air. The bread’s golden-brown exterior, a testament to your skilled cooking, hints at the flavorful treat waiting within.
Whether you choose to cut your bannock into wedges, squares, or any other shape that suits your preference, the first bite is a revelation. The tangy notes from the sourdough starter dance on your taste buds, complemented by the rich, rustic flavors of the bread. Sourdough bannock is a versatile delight; it can be enjoyed on its own, spread with butter, or paired with your favorite dishes. Its simplicity and deliciousness make it an ideal accompaniment to soups, stews, or as a standalone treat.
For More- Cheesy Whole-Wheat Sourdough Bread
Customize Your Sourdough Bannock
While the basic sourdough bannock is a delicious treat, you can add your own twists to make it even more special. Here are some ideas:
- Flavorful Herbs: Incorporate chopped herbs like rosemary, thyme, or dill into the dough for an extra burst of flavor.
- Cheese and Garlic: Add grated cheese and minced garlic for a savory variation.
- Sweet Touch: For a sweet bannock, mix in some sugar, cinnamon, or vanilla extract. Top it with honey or your favorite fruit preserves.
Storing Your Sourdough Bannock
Properly storing your sourdough bannock is essential to keep it fresh and flavorful. Once you’ve enjoyed this delectable bread, follow these steps to ensure it stays at its best:
- Cool Completely: Allow the bannock to cool to room temperature on a wire rack. This prevents trapped moisture, which can make the bread soggy.
- Wrap It Well: Once cooled, wrap the bannock in plastic wrap or place it in an airtight container. Ensure it’s tightly sealed to keep it from drying out or absorbing any odors from your refrigerator.
- Refrigeration: While sourdough bannock can be stored at room temperature for a day or two, it’s best to refrigerate it for longer storage. This helps maintain its freshness.
- Freezing: For extended storage, sourdough bannock can also be frozen. Wrap it in plastic wrap or aluminum foil, place it in an airtight container, and freeze it. To enjoy it again, simply thaw and reheat in an oven or toaster to revive its delightful texture.
Conclusion
Sourdough bannock bread is a delightful addition to any meal or a satisfying snack on its own. Its rich, tangy flavor and simplicity make it a favorite among those who appreciate the joys of homemade bread. By following this recipe, you can create your own bannock bread that captures the essence of tradition and the wonderful world of sourdough. So, roll up your sleeves and embark on a culinary journey that will reward you with a tasty and versatile treat for your table.
FAQs
What is bannock bread?
What is bannock bread?
Bannock is a type of flatbread that originated in Scotland and has been adapted and enjoyed in various cultures around the world. It’s typically made with simple ingredients like flour, water, and baking powder. In this recipe, we’ve added a sourdough twist.
What’s the role of the sourdough starter in this recipe?
What’s the role of the sourdough starter in this recipe?
The sourdough starter not only adds a unique tangy flavor to the bannock but also contributes to the bread’s leavening, allowing it to rise without the need for commercial yeast.
Can I make this bannock without a sourdough starter?
Can I make this bannock without a sourdough starter?
Absolutely! While this recipe focuses on a sourdough version, you can make traditional bannock by omitting the starter and using a mixture of flour, water, and baking powder instead.
How do I know when the bannock is cooked through?
How do I know when the bannock is cooked through?
The bannock should be golden brown on both sides and slightly puffed. Cooking times may vary depending on your pan and heat source, so keep an eye on it to avoid overcooking.
Can I store leftover bannock?
Can I store leftover bannock?
Yes, you can store leftover bannock in an airtight container. To enjoy it again, reheat in the oven or toaster to bring back its delightful texture.

