
Fermented Spring Radishes – In a world increasingly fascinated by the intersection of flavor and nutrition, fermented foods have emerged as nutritional powerhouses. Among these, fermented spring radishes stand out, offering a delightful and tangy addition to the culinary landscape.
This introduction explores the art and science behind fermentation, shedding light on the historical roots of this preservation method. We delve into the intricate process of transforming these crunchy veggies into sweets high in probiotics, emphasizing the nutritional value of spring radishes.
As we journey through the fermentation steps, discover how this age-old practice enhances not only the taste but also the health benefits of spring radishes. Whether you’re a culinary enthusiast or a health-conscious consumer, the exploration of fermented spring radishes promises to be a rewarding adventure in taste and wellness.
Importance of incorporating fermented foods into the diet
Incorporating fermented foods into the diet holds significant importance for both culinary enjoyment and overall well-being. These foods undergo a transformative process where microorganisms like bacteria, yeast, and molds break down and convert components in the food, such as sugars and starches, into beneficial compounds. Here are key reasons why integrating fermented foods is valuable:
- Probiotic Boost: Fermented foods are rich in probiotics—live beneficial bacteria that promote a healthy gut microbiome. A balanced gut microbiota contributes to improved digestion, nutrient absorption, and a strengthened immune system.
- Enhanced Nutrient Absorption: Fermentation can increase the bioavailability of nutrients in foods, making them easier for the body to absorb. By releasing more vitamins, minerals, and antioxidants, this method may improve the fermented products’ nutritional profile.
- Digestive Health: Probiotics found in fermented foods contribute to a balanced gut flora, which is linked to improved digestive health. They might make gastrointestinal experiences more comfortable and lessen the symptoms of digestive diseases.
- Potential Mental Health Benefits: The gut-brain connection suggests that a healthy gut microbiome can positively influence mental health. Fermented foods may play a role in supporting emotional well-being and cognitive function.
- Preservation and Food Diversity: Historically, fermentation served as a method of food preservation. Communities might increase the shelf life of perishable goods by fermenting food, guaranteeing a varied and nourishing diet all year round.
- Palate Diversity and Culinary Enjoyment: Fermented foods offer a spectrum of flavors, textures, and aromas. Incorporating them into the diet introduces diversity to the palate, enhancing the overall culinary experience and encouraging a broader range of food choices.
Also, Read – Simple Lacto Fermented Guacamole Cups
Fermented Spring Radishes
Spring radishes can be flavorfully preserved and enhanced by fermenting them. Here’s a simple six-step guide to making fermented spring radishes:
Ingredients:
- Fresh spring radishes
- Sea salt or pickling salt
- Filtered water
Equipment:
- Glass jar with a lid
- Weight (small glass or plastic weight)
- Cloth or coffee filter
- Rubber band or string
- Cutting board and knife
- Bowl
Also, Read – Lacto-fermented apple butter
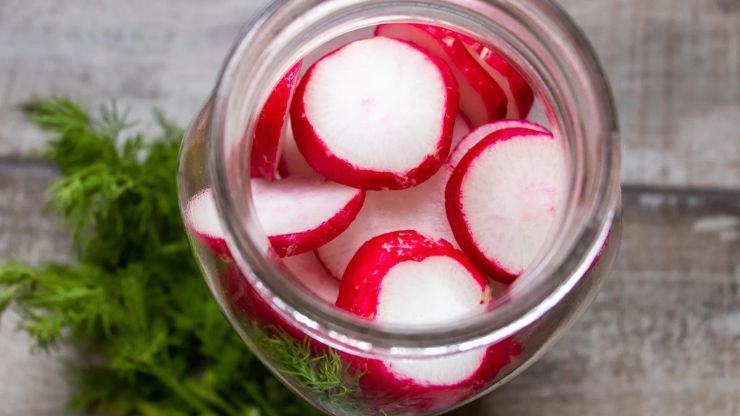
Select and Prepare Radishes
Choose fresh, firm spring radishes. Wash them thoroughly, removing any dirt. Trim the radish tops and tails, then slice into your desired shape, such as slices or quarters. Ensure uniformity for even fermentation.
Prepare Brine
One to two teaspoons of sea salt dissolved in one quart of filtered water yields a brine solution. Stir until the salt is fully dissolved, forming a saline solution. This brine will serve as the preserving medium for the radishes during the fermentation process.
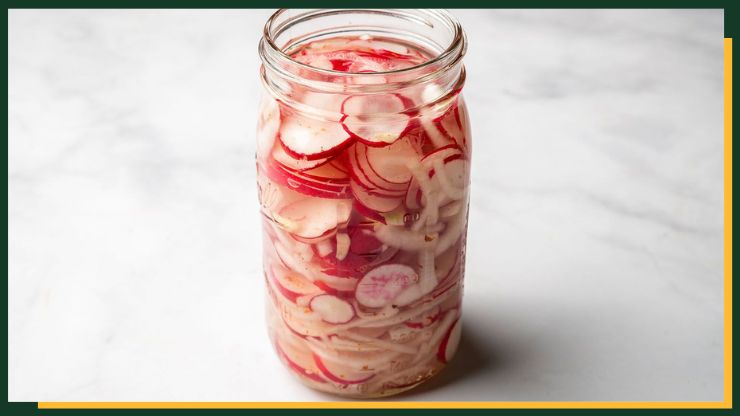
Pack Radishes into Jar
Place the prepared radish slices or quarters into a clean glass jar, leaving some space at the top. Carefully pack the radishes, ensuring they are not overly compressed, allowing the brine to circulate freely. Pour the prepared brine solution over the radishes, ensuring they are fully submerged. Leave about an inch of space between the brine and the top of the jar to accommodate expansion during fermentation.
Add Weight
Place a small glass or plastic weight on top of the radishes within the jar. This weight ensures the radishes remain submerged in the brine, preventing exposure to air that can lead to mold formation. The weight aids in establishing the anaerobic atmosphere that fermentation requires.
Cover and Ferment
Put a fresh cloth or coffee filter over the jar and fasten it with a string or rubber band. This allows gases produced during fermentation to escape while preventing contaminants from entering. To let it to ferment, place the jar in a cold, dark place.
Check the radishes daily, pressing them down to ensure they stay submerged. Fermentation time varies, typically taking 3-7 days. Adjust based on personal taste preferences, with longer fermentation intensifying flavors.
Taste and Store
After 3-7 days of fermentation, taste the radishes to determine the desired level of tanginess. Once satisfied, remove the weight and secure the jar with a lid. Store the fermented radishes in the refrigerator to slow down the fermentation process. With time, the flavors will continue to evolve. Enjoy the flavorful fermented spring radishes on their own or in sandwiches and salads.
Conclusion
In conclusion, the incorporation of fermented spring radishes and other fermented foods isn’t merely a culinary trend but a gateway to enhanced well-being. From bolstering gut health with probiotics to unlocking additional nutritional benefits, these tangy delights offer a spectrum of advantages.
Beyond the nutritional realm, fermented foods contribute to a diverse and flavorful gastronomic experience, echoing centuries-old practices of preservation and culinary innovation.
As we savor the unique tastes and harness the potential health perks, embracing fermented foods becomes a harmonious blend of tradition and modern wellness—a journey where each bite not only tantalizes the taste buds but also nurtures the body from the inside out.
FAQs
Fermented spring radishes are rich in probiotics, promoting a healthy gut microbiome. This can improve digestion, enhance nutrient absorption, and contribute to a strengthened immune system.
The fermentation time for spring radishes can vary but typically ranges from a few days to a couple of weeks. Factors such as temperature, salt concentration, and personal taste preferences influence the fermentation duration.
Yes, fermented spring radishes are generally well-tolerated by those with lactose intolerance. The fermentation process reduces lactose content, and the beneficial bacteria may aid in its digestion.
Signs of spoilage include off-putting odors, mold growth, or unusual discoloration. If the radishes develop an unpleasant smell or show visible signs of contamination, it’s advisable to discard them.