
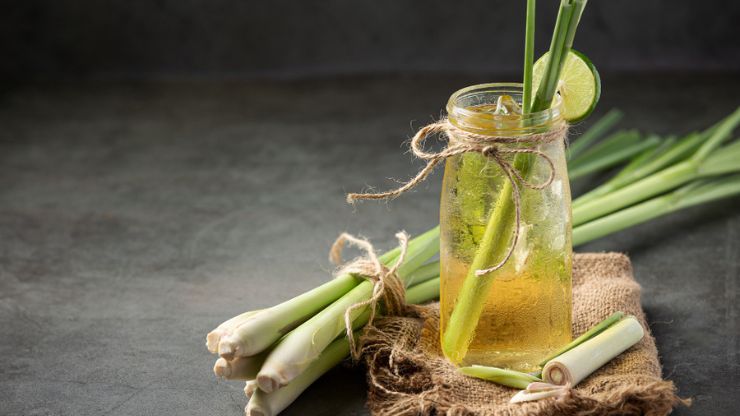
Celery, often relegated to a supporting role in salads or as a crunchy snack, undergoes a remarkable transformation through the process of fermentation. In this guide, we explore the simple yet magical steps to craft your very own fermented celery. From selecting the freshest stalks to infusing unique flavors, the journey unfolds with each step. Fermented celery not only preserves the crispness of this humble vegetable but also introduces a tangy, probiotic-rich kick to your culinary repertoire. Join us in unlocking the secrets to fermenting celery, turning it into a versatile and healthful addition to your meals. Whether you’re a seasoned fermenter or a curious beginner, this guide promises a delightful exploration into the world of fermented vegetables.
Embracing the World of Fermented Celery
Celery, with its crisp texture and mild flavor, becomes a powerhouse of taste and nutrition when fermented. This guide is your key to exploring the rich world of fermented celery, offering a step-by-step process that turns this often-neglected vegetable into a probiotic-rich treat. Get ready to embark on a journey of flavor, health, and culinary creativity.
Step 1: Choosing Quality Celery
Selecting the right celery is the first crucial step in creating a delightful batch of fermented celery. Opt for fresh, vibrant celery stalks with firm, crisp texture. Look for celery with tightly packed, pale green to dark green stalks and leaves. Avoid stalks with signs of wilting, discoloration, or sponginess. The aroma should be fresh and mildly earthy.
Additionally, choosing organic celery can enhance the overall quality of your ferment, ensuring that you start with produce free from synthetic pesticides. By paying attention to these details during the selection process, you set the stage for a successful fermentation journey, resulting in crisp and flavorful fermented celery.
Also Read- How to Make Fermented Salsa
Step 2: Cleaning and Preparing Celery
After securing the finest celery, the next step is the thorough cleaning and preparation of this versatile vegetable. Begin by removing any dirt or debris by rinsing the celery under cold running water. Pay special attention to the base of the stalks and the inner leaves where soil may accumulate. For added cleanliness, use a vegetable brush to gently scrub the surface.
Once cleaned, trim the leafy tops and the root end, as they can contribute to unwanted bitterness. For the fermentation process, it’s crucial to cut the celery into manageable pieces, ensuring they fit comfortably into your chosen fermentation vessel. By taking these meticulous steps, you set the foundation for a clean and well-prepared batch of fermented celery.
Step 3: Crafting the Brin

With your meticulously cleaned and prepared celery ready, it’s time to create the essential element for fermentation—the brine. In a large mixing bowl, dissolve sea salt in water to form the brine. The recommended ratio typically ranges from 1 to 2 tablespoons of sea salt per quart of water, ensuring a balance that fosters healthy fermentation. Stir the mixture thoroughly until the salt is fully dissolved.
This brine will not only act as a preservative but will also encourage the growth of beneficial lactic acid bacteria, transforming your celery into a probiotic-rich delight. Crafting a well-balanced brine is a key element in the alchemy of fermentation, setting the stage for the transformation that lies ahead.
Step 4: Adding Flavor (Optional
Here’s where the artistry of fermentation truly comes to life—infusing your celery with additional flavors for a personalized touch. While entirely optional, adding herbs and spices at this stage can elevate your fermented celery to new heights. Popular choices include thyme, garlic, bay leaves, or red pepper flakes for a hint of heat.
Experiment with different combinations to tailor the flavor profile to your preferences. The infusion of these aromatic elements not only imparts complexity to the celery but also introduces delightful notes that will dance on your taste buds once the fermentation process is complete. This optional step adds a creative dimension to your fermented celery, making it uniquely yours.
Step 5: Packing the Jars

With your celery, brine, and optional flavorings at the ready, it’s time to pack the jars for the fermentation journey. Take clean Mason jars and carefully place the prepared celery pieces inside, leaving some space at the top. Press down firmly on the celery to eliminate any air pockets that may hinder the fermentation process.
Ensure the celery is packed snugly but not overly tight. Once the celery is in place, pour the crafted brine over the top, making sure it fully covers the celery. The liquid acts as a protective medium, promoting the growth of beneficial bacteria and preventing harmful pathogens. This step is crucial for ensuring a successful fermentation, creating an environment where the celery can transform into a crisp and tangy delight.
Step 6: Using Fermentation Weights
To enhance the efficiency of the fermentation process and ensure your celery remains submerged in the brine, employ the assistance of fermentation weights. These weights can be specifically designed glass or ceramic weights that fit inside the mouth of the jar, or even clean stones that are sanitized thoroughly.
Placing these weights on top of the celery helps prevent any pieces from floating to the surface, minimizing exposure to oxygen and reducing the risk of spoilage. The presence of weights contributes to a controlled fermentation environment, allowing beneficial bacteria to thrive and work their magic on your celery, transforming it into a crunchy, probiotic-rich treat.
Step 7: Covering with Cloth
As your celery undergoes the fascinating process of fermentation, it’s essential to cover the mouth of each jar with a breathable material. A piece of cheesecloth or a coffee filter works well for this purpose. Secure the chosen material with rubber bands or string to create a barrier that allows the fermenting celery to breathe while keeping out potential contaminants.
This step is crucial in maintaining the balance of the fermentation environment, allowing gases produced during the process to escape while preventing undesirable elements from entering. Covering with a breathable cloth ensures a successful and hygienic fermentation process for your celery.
Step 8: Fermentation Time
Now that your jars of celery are securely covered, it’s time to let the magic of fermentation unfold. Place the jars in a cool, dark place where the ambient temperature is relatively stable. The duration of fermentation can vary based on factors such as room temperature and personal preference but typically spans around 5 to 7 days.
During this time, the beneficial lactic acid bacteria present in the environment will feast on the sugars in the celery, creating that distinctive tangy flavor. Regularly check on your jars to monitor the progression, tasting along the way to gauge the level of tanginess that suits your palate. The patience invested in this step will be rewarded with crisp, probiotic-packed fermented celery.
Step 9: Taste Testing and Refrigeration
As the days of fermentation pass, it’s essential to periodically check the flavor of your fermented celery to determine whether it has reached your desired level of tanginess. Once the taste aligns with your preferences, it’s time to halt the fermentation process. Transfer the jars to the refrigerator to slow down the activity of the beneficial bacteria.
Refrigeration not only preserves the crisp texture of the celery but also ensures that the flavors remain stable over an extended period. Your taste buds will be treated to a delightful symphony of textures and tanginess, making the patience of the fermentation process well worth it.
Also Read- How to Make Fermented Coleslaw
Conclusion
As we conclude this journey into the art of fermenting celery, we find ourselves with jars of probiotic-rich goodness that not only elevate the flavor of celery but also contribute to our overall well-being. The tangy notes and enhanced nutritional profile make fermented celery a versatile ingredient, perfect for salads, snacks, or as a unique side dish. Embrace the transformative power of fermentation, and let your palate dance with joy as you savor the crisp, tangy delights of your homemade fermented celery.
FAQs
The fermentation duration varies, but a common range is 3 to 7 days. Taste-testing helps determine the desired tanginess.
Absolutely! Experiment with spices like dill, garlic, or red pepper flakes to create unique flavor profiles.
Yes, bubbling indicates the release of carbon dioxide—a sign that fermentation is actively taking place. It’s perfectly normal and expected.