
Embark on a culinary adventure with our guide on “How to Make Fermented Coleslaw.” Elevate your coleslaw game as we explore the art of fermentation, transforming ordinary cabbage and vegetables into a crunchy, tangy, and probiotic-rich delight. This step-by-step journey unveils the secrets of crafting a homemade coleslaw that not only tantalizes the taste buds but also promotes gut health.
From selecting the freshest ingredients to infusing unique flavors and achieving the perfect fermentation balance, this guide is your passport to creating a culinary masterpiece. Unleash your creativity by customizing herbs and spices, and savor the rewards as your coleslaw undergoes a magical transformation. Join us in this flavorful voyage, where each step brings you closer to a jar full of goodness ready to enhance your meals with every crunchy, probiotic-packed bite.
Step by step Process to make Fermented Coleslaw
Embark on a flavorful journey with our step-by-step guide to crafting Fermented Coleslaw. From selecting crisp vegetables to infusing enticing flavors, each detailed step unfolds the art of fermentation, transforming ordinary ingredients into a probiotic-rich delicacy. Elevate your coleslaw-making skills and savor the rewards of a homemade creation that not only delights the palate with its crunch and tanginess but also contributes to digestive well-being.
Step 1: Cabbage Selection and Shredding
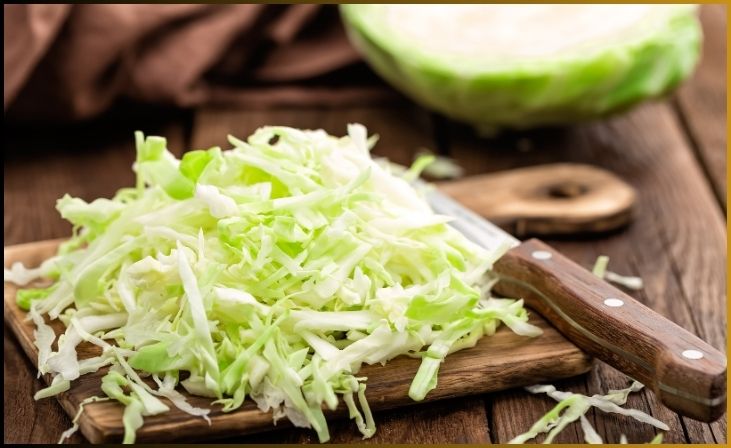
The journey to crafting the perfect fermented coleslaw begins with a crucial first step: the selection and shredding of the cabbage. Opt for a fresh, firm cabbage, ideally green or red, ensuring it is free from wilting or discoloration. The vibrant leaves should promise a crisp texture that will endure the fermentation process.
Using a sharp knife or a food processor, finely shred the cabbage, maintaining a uniform texture for an optimal crunch. This step lays the foundation for the coleslaw’s visual appeal and textural delight, ensuring that the cabbage provides the ideal canvas for the transformative magic of fermentation to take place.
Also Read- A Comprehensive Guide To Make Your Own Fermented Vegetables
Step 2: Vegetable Medley Addition
Building on the crisp foundation of shredded cabbage, the second step in creating the perfect fermented coleslaw involves the addition of a vibrant vegetable medley. Elevate both the flavor profile and nutritional content by incorporating colorful elements like carrots, bell peppers, and red onions. Julienne or grate these vegetables finely, introducing a burst of sweetness, varied crunch, and a spectrum of vibrant hues to the coleslaw mix.
This step is not only about enhancing the visual appeal but also introducing a diverse range of nutrients and flavors. The vegetable medley, when harmoniously blended with the cabbage, creates a coleslaw that is both visually enticing and rich in a variety of complementary tastes and textures.
Step 3: Crafting the Brine
The third step in the journey to crafting the perfect fermented coleslaw involves the meticulous creation of the brine. This salty elixir serves as the catalyst for infusing the coleslaw with probiotic goodness. In a large bowl, dissolve sea salt in water, maintaining a ratio of approximately 1 to 2 tablespoons of salt per quart of water.
The key is to ensure the salt is fully dissolved, creating a balanced brine that will contribute to both the preservation and fermentation of the coleslaw. This step sets the stage for the transformative magic of fermentation, where the brine becomes the medium through which beneficial bacteria work their flavorful wonders on the vegetables.
Step 4: Marinating the Cabbage and Vegetables
With the brine crafted, the fourth step involves immersing the shredded cabbage and vibrant vegetable medley into this salty elixir, initiating the marination process. Every piece of the cabbage and vegetable mix is thoroughly coated in the brine, ensuring they absorb the savory essence that will kickstart the fermentation journey.
This step is crucial as it serves as a bridge between the raw ingredients and the probiotic-rich coleslaw that will emerge after fermentation. As the vegetables marinate, they begin to undergo subtle changes, preparing to metamorphose into a symphony of flavors and textures during the fermentation process. The success of this step contributes significantly to the overall taste and probiotic development of the final coleslaw product.
Step 5: Flavor Infusion with Herbs and Spices
In the fifth step of crafting the perfect fermented coleslaw, we elevate the flavor profile by infusing the marinated cabbage and vegetables with a carefully curated selection of herbs and spices. This step allows for a creative expression of taste, enabling you to personalize your coleslaw to suit your preferences. Consider incorporating aromatic herbs like dill, parsley, or cilantro for freshness, and spices such as celery seeds, mustard seeds, or a pinch of cayenne for added depth.
This flavor infusion not only imparts a delightful complexity to the coleslaw but also contributes to the overall sensory experience, making each bite a harmonious blend of crispness, tanginess, and the nuanced notes of selected herbs and spices.
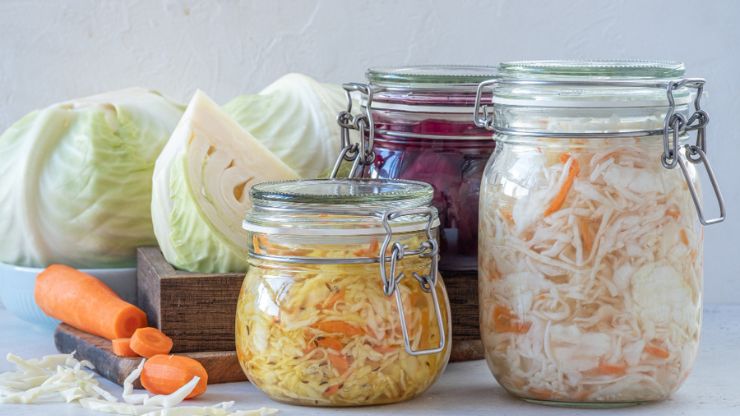
Step 6: Packing the Jars
As we progress in the journey of crafting fermented coleslaw, the sixth step involves packing the flavorful mixture into clean, airtight jars. Carefully transfer the marinated cabbage and vegetable blend into the jars, pressing down firmly to eliminate any trapped air pockets. The goal is to create a compact, tightly packed environment that facilitates the fermentation process.
This step ensures that the vegetables remain submerged in the brine, promoting an even distribution of flavors and allowing the beneficial bacteria to work their magic uniformly. A well-packed jar sets the stage for a successful fermentation, ultimately contributing to the development of a tangy, probiotic-rich coleslaw.
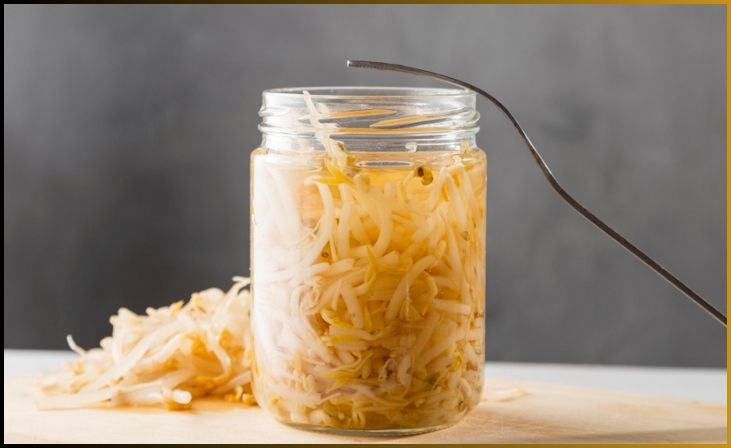
Step 7: Using Fermentation Weights
In the seventh step of crafting fermented coleslaw, the use of fermentation weights becomes essential to maintain the optimal conditions for fermentation. Place specially designed glass weights or clean stones onto the mixture within the jar, ensuring that the vegetables are fully submerged in the brine. These weights play a crucial role in preventing the coleslaw from floating to the surface, thus minimizing the risk of exposure to air.
This ensures an anaerobic environment, ideal for the proliferation of beneficial bacteria that contribute to the tangy and probiotic qualities of the coleslaw. The use of fermentation weights guarantees a controlled and effective fermentation process.
Step 8: Covering with Cloth
As we approach the final steps of our journey in crafting fermented coleslaw, the eighth step involves covering the mouth of each jar with a piece of cheesecloth or a coffee filter. Secure the covering with rubber bands or string, allowing the fermenting coleslaw to breathe while preventing contaminants from entering.
This step is crucial for maintaining the delicate balance of flavors and supporting the fermentation process. Allowing air exchange is key to creating the perfect conditions for beneficial bacteria to thrive, transforming the cabbage and vegetables into a tangy and probiotic-rich delight. The covering ensures a protective yet breathable environment for the coleslaw to ferment successfully.
Step 9: Fermentation Time
In the ninth step of crafting fermented coleslaw, patience becomes the key ingredient as we allow the mixture to undergo the enchanting process of fermentation. Place the covered jars in a cool, dark place and let time work its magic. The duration can vary but is typically around 5 to 7 days. During this period, beneficial bacteria present in the brine initiate the fermentation, transforming the cabbage and vegetables into a tangy and probiotic-rich delicacy.
Regularly check for the desired level of tanginess, and once achieved, the jars can be transferred to the refrigerator. This not only slows down the fermentation process but also helps preserve the coleslaw for extended enjoyment.
For More- The Ultimate Guide to Fermented Jalapenos: How to Make, Store, and Enjoy!
Step 10: Refrigeration and Enjoyment
As we reach the final step in our journey of crafting fermented coleslaw, it’s time to transition from the fermentation phase to long-term storage and enjoyment. Once the coleslaw has achieved the desired level of tanginess, transfer the jars to the refrigerator. Refrigeration not only slows down the fermentation process but also enhances the crispness of the coleslaw, providing a refreshing and enjoyable texture.
From this point onward, your homemade fermented coleslaw is ready to be savored. Serve it as a delightful side dish, a probiotic-rich addition to sandwiches, or as a flavor-packed topping for various culinary creations. The culmination of these ten steps results in a crunchy, tangy, and probiotic-rich coleslaw that reflects the artistry of fermentation.
Conclusion
Crafting homemade fermented coleslaw is a culinary adventure that combines the crisp textures of fresh vegetables with the tangy notes of fermentation. From the careful selection of cabbage to the infusion of herbs and spices, each step contributes to a symphony of flavors. The transformative power of fermentation not only enhances the taste but also introduces probiotic benefits to this classic dish. Elevate your coleslaw experience by embracing the art of fermentation and savoring the crunchy, tangy goodness of this probiotic-rich creation.
FAQs
Absolutely! Experiment with your favorite vegetables to create a personalized blend. Ensure they are fresh and suitable for fermentation.
The fermentation time is typically around 5 to 7 days. However, the duration may vary based on factors like room temperature and desired tanginess.
While not mandatory, using fermentation weights and airtight jars can enhance the fermentation process by creating optimal conditions for beneficial bacteria.