
Fermented garlic scapes might be something you’ve never heard talked about because, well, you’ve never heard of garlic scapes themselves.
What are garlic scapes? Once you’ve seen them, you’ll never forget them. Dramatic and curling, with delicate white buds at the tips, scapes are the flower of the garlic plant, typically appearing in the garden in mid-June.
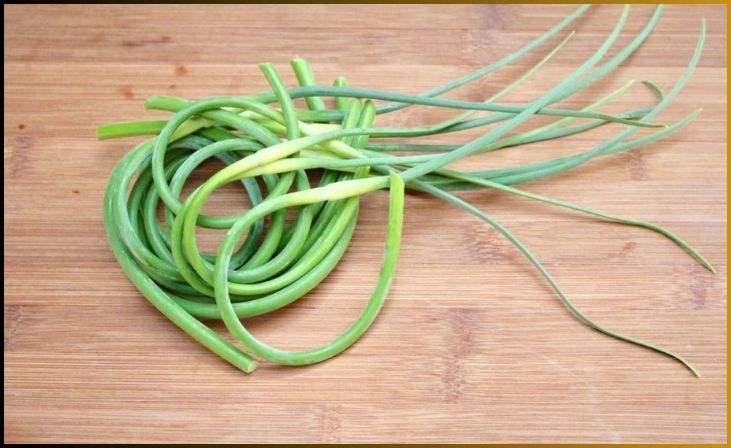
If you grow hard-neck varieties of garlic (soft-neck varieties do not produce scapes), you will want to cut the scapes off the plant so it will dedicate energy into making a larger bulb below the soil. Once you’ve cut all your scapes, you’ll end up with a beautiful pile of spirals, resembling curled-up green onions. These scapes are a delicious harvest on their own—a milder and sweeter version of the bulbs that will follow later in the season.
They can be used in many dishes just like you’d use garlic: in soups, stir-fries, roasted with olive oil, or even grilled. You can preserve scapes by chopping and freezing them for later use, or you can preserve a batch by fermenting them.
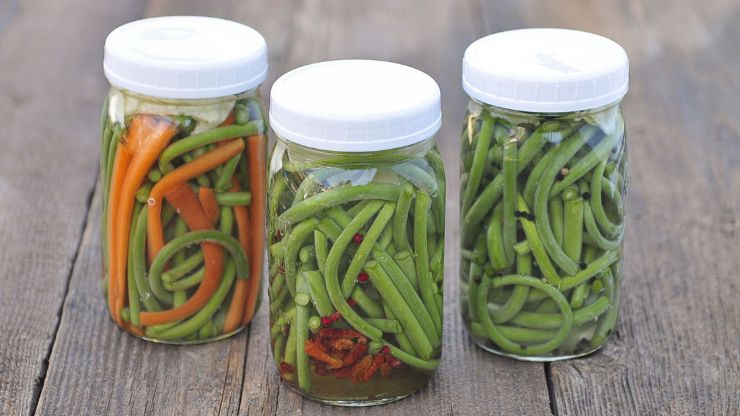
A quart jar filled with fermented garlic scapes is an impressive sight. The curls lay nicely inside the jar with the white buds peeking through some of the horizontal, symmetric lines. It’s truly a work of art on your counter, and in the end, you’ll wind up with delicious scape pickles. Munch on them plain, or chop them up and use them as you would fresh scapes—but try not to heat them up too much, as you’ll lose probiotics that way. I like chopping a pickled scape and putting it into a salad or on top of a warm bowl of potato soup.
What’s Garlic Scapes
A garlic scape is the emerging flower bud of the garlic plant, making its appearance from mid-spring to early summer, well ahead of the garlic cloves’ harvest time. Removing the flowering bud serves the purpose of channeling the plant’s energy toward bulb development rather than flower formation.
Garlic scapes boast a delightful garlic flavor, resembling scallions in both texture and appearance but with captivating curliness. Their photogenic quality makes them a visually appealing addition to culinary creations. Recognizing the value of these elegant and piquant stems, enthusiasts often seek them out in farmers’ markets during their seasonal availability, especially if they don’t have the opportunity to grow their own.
How To Naturally Ferment Garlic Scapes
Produce contains natural beneficial bacteria, particularly lactic acid-producing Lactobacillus. When handled correctly, these bacteria can be harnessed to preserve food by generating organic acids, including acetic acid (commonly known as vinegar). These organic acids create an inhospitable environment for harmful bacteria that lead to spoilage.
To add an extra layer of protection against undesirable microbial growth, we immerse our vegetables entirely in brine or solution of saltwater. The combination of salinity and the absence of oxygen works synergistically to deter the development of molds and other undesirable microbes, ensuring the preservation process is effective.
Quick Link: DIY Fermented Apple Cider Vinegar
Lacto Fermented Garlic Scapes Recipe
Follow these instructions to get delicious Garlic scapes
Ingredients
• 1 wide-mouth quart jar
• 20-24 garlic scapes
• 2 1/2 c. filtered water (or leave tap water out overnight to evaporate the chlorine)
• 1 T. Himalayan Powder Salt
Instructions
1. Harvest your scapes by cutting the stems where they meet the top leaves of the garlic plant. They are ready to harvest when they have become curled up and spiraled with white buds at the tips.
2. Bring scapes inside and trim the bottoms to remove the tough part. You can usually tell where the stem has become tough because it will be a lighter green or yellow color. Or, you can test the stem like you would an asparagus stem; lightly bend it, and where it bends naturally toward the bottom, trim. Leave everything else intact, especially the buds!
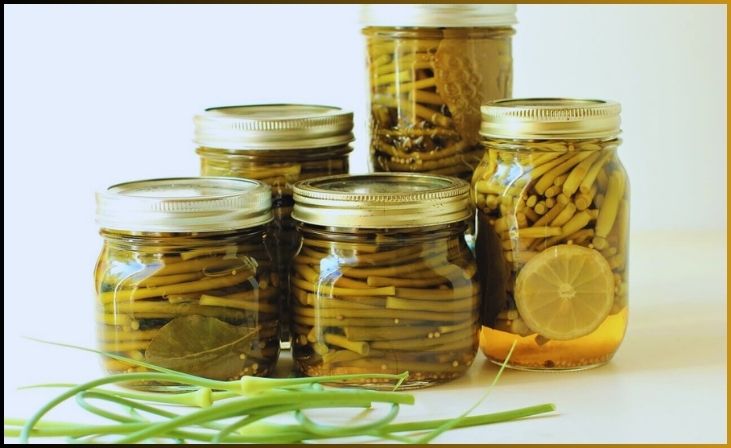
3. This is the fun part. Make sure your hands and all equipment are clean (sterilizing is not necessary). One at a time, take the opposite ends of each scape and curl them together so they fit into the quart jar. Start stacking them, pressing them down occasionally. There is something very satisfying about seeing the jar filled with beautiful scapes—it’s like creating art!
4. In a separate spouted measuring cup, combine the water and salt until completely dissolved to make a brine. Pour the brine over the scapes, and place a weight over the top to keep the scapes submerged. There should be an inch of space between the top of the brine and the top of the jar. If you stack the jar full of scapes, there should be enough brine (with a bit extra), but if you run short of brine, mix up another ½ c. water with 1/2 t. salt.
5. Place a lid on the jar, and an airlock if you have one. Place the jar of scapes out of direct sunlight, avoiding extreme temperatures. This is one ferment you’ll want to leave in plain sight—right on the counter—so that you can show it off!
6. Start testing the scapes after a week. The longer they ferment, the more sour bite they will get. Once they have reached a flavor you like, put the jar in the fridge, cover it, and remove the airlock if you used one. Enjoy your delicious scape pickles for up to six months–however, they may not even last until it’s time to harvest your garlic bulbs!
What are ideal meals for pickled garlic scapes?
Discover the remarkable versatility of pickled garlic scapes—they make a perfect addition to sandwiches, and charcuterie boards, or can be a unique substitute for capers or pickles in various dishes. Elevate your culinary creations by serving them alongside sous vide pork tenderloin or roasted hot dogs. Their zesty flair also makes them an excellent garnish for Caesar or Bloody Mary cocktails. Don’t overlook the probiotic-rich vinegar left behind; utilize it to craft flavorful salad dressings or to add a burst of bright acidity to heartier dishes like borscht or chicken stew.
Bottom Line
Embrace the world of lacto-fermentation with the enticing transformation of garlic scapes. From their crisp texture to the enhanced depth of flavor, lacto-fermented garlic scapes are a versatile ingredient that adds a zing to salads, dips, and more. By incorporating this simple yet impactful technique into your kitchen routine, you not only elevate your dishes but also enjoy the numerous health benefits of probiotic-rich foods.
FAQs
Garlic scapes are the green shoots that emerge from garlic bulbs. Fermenting them not only preserves their seasonal availability but also imparts a unique tangy flavor. The lacto-fermentation process enhances their taste while introducing beneficial probiotics.
The fermentation time varies, but generally, garlic scapes are ready in about one to two weeks. Taste them periodically, and when they reach the desired level of tanginess, move them to the refrigerator to slow down the fermentation process.
Absolutely! Lacto-fermented garlic scapes add a burst of flavor to various dishes. Chop them and mix them into salads, blend them into dressings, or use them as a tangy topping for grilled meats. Get creative and experiment with different culinary applications.
Ensure cleanliness and use non-chlorinated water to create a favorable environment for lacto-fermentation. Always follow proper hygiene practices to prevent contamination, and if you notice any signs of spoilage, discard the batch.