
Lacto-fermented olives, a timeless delicacy cherished for centuries, not only tantalize our taste buds but also pack a punch of health benefits. In this article, we’ll delve into the fascinating world of lacto-fermented olives, exploring their rich history, the art of fermentation, nutritional advantages, and practical tips for incorporating them into your diet.
Definition of Lacto-fermented Olives
Lacto-fermented olives are a traditional method of preserving and enhancing the flavor of olives through natural fermentation. Unlike brined olives, lacto-fermentation involves the activity of lactic acid bacteria, imparting a unique tangy taste to the fruit.
Historical Significance
Dating back to ancient times, the practice of fermenting olives was not merely a culinary technique but a method of preservation rooted in various cultures worldwide. Understanding this history adds depth to our appreciation of these savory treats.
Health Benefits
Beyond their exquisite taste, lacto-fermented olives offer a myriad of health benefits. Packed with probiotics and retaining essential nutrients, they contribute to digestive health and overall well-being.
The Lacto-fermentation Process

Explanation of Lacto-fermentation
Lacto-fermentation is a natural preservation process where beneficial bacteria convert sugars into lactic acid, creating an environment unfavorable to harmful bacteria. This process not only preserves the olives but also enhances their nutritional profile.
Key Ingredients and Equipment
To embark on a lacto-fermentation journey, you’ll need olives, salt, water, and basic kitchen tools. Understanding the role of each element ensures a successful fermentation process.
Step-by-step Process
Let’s walk through the simple yet intricate steps of lacto-fermenting olives at home, from selecting the freshest olives to savoring the finished product.
Read Also: Naturally Fermented Spiced Beets for Fall
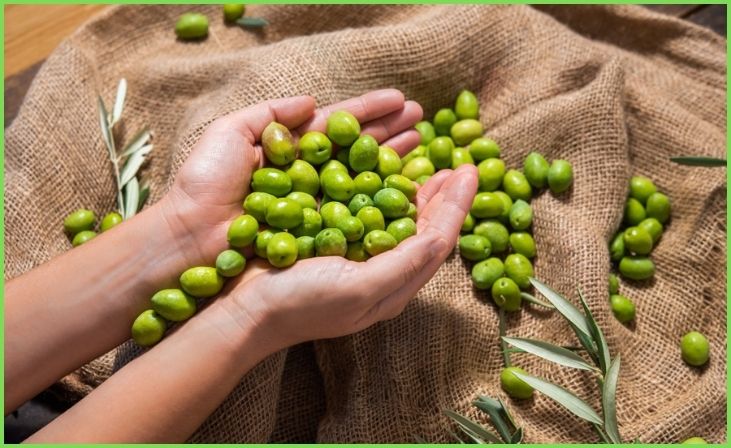
Varieties of Olives for Fermentation

Best Olive Varieties
Not all olives are created equal when it comes to fermentation. Discover the varieties that lend themselves best to the lacto-fermentation process, each offering a distinct flavor profile.
Flavor Profiles
Understanding the flavor nuances of different olive varieties allows you to tailor your fermentation experience to your taste preferences.
Selecting the Right Olives for Lacto-fermentation
Choosing the right olives is crucial for a successful fermentation. We’ll guide you through the selection process, ensuring your olives are primed for probiotic perfection.
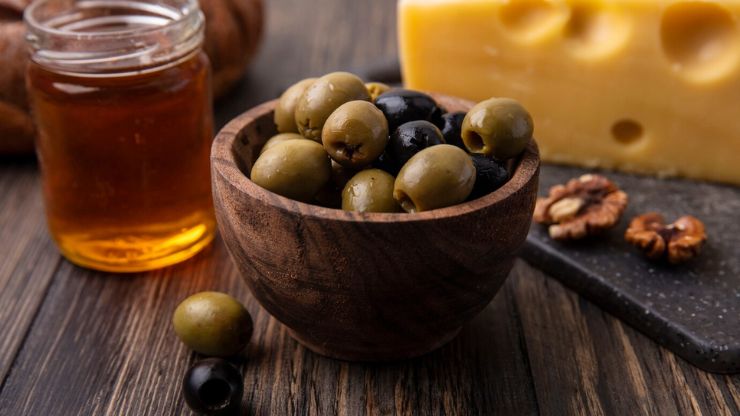
Health Benefits of Lacto-fermented Olives
Probiotic Content
Probiotics are the unsung heroes of gut health, and lacto-fermented olives are a delicious source. Learn how these beneficial bacteria contribute to a thriving gut microbiome.
Improved Digestion
Beyond probiotics, the lacto-fermentation process enhances the digestibility of olives, making their nutrients more accessible to your body.
Nutrient Retention
Contrary to some preservation methods that may deplete nutritional value, lacto-fermentation ensures that the olives retain their essential nutrients, offering a wholesome snack.
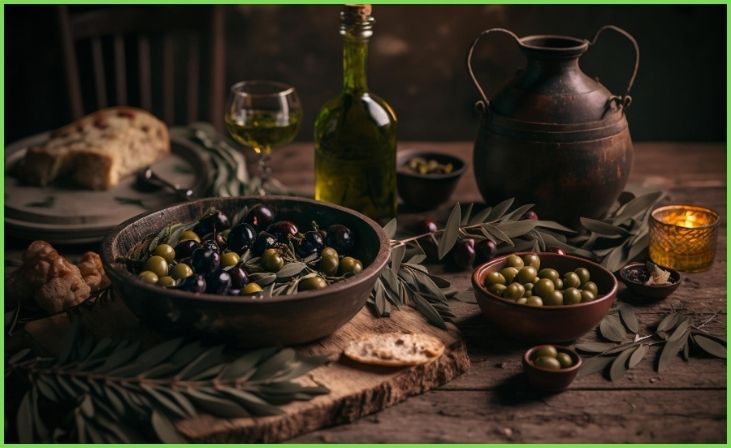
Incorporating Lacto-fermented Olives into Your Diet
Culinary Uses
Explore the versatile ways to incorporate lacto-fermented olives into your meals, from salads to appetizers, unlocking a world of culinary creativity.
Recipes and Serving Suggestions
Delve into enticing recipes that showcase the unique flavor profile of lacto-fermented olives, elevating your dining experience.
Enhancing Flavors in Dishes
Discover the secret of using lacto-fermented olives to enhance the flavors of your favorite dishes, adding a savory twist to your culinary creations.
Common Misconceptions
Clarifying Myths About Lacto-fermented Olives
Separating fact from fiction, we address common misconceptions surrounding the safety and enjoyment of lacto-fermented olives.
Addressing Concerns About Safety
Understand the safety measures involved in home fermentation, ensuring that your journey into lacto-fermentation is both enjoyable and risk-free.
Dispelling Fermentation Misconceptions
Uncover the truth behind some prevalent myths about the fermentation process, empowering you to embrace this ancient culinary technique with confidence.
Lacto-fermented Olives vs. Other Olive Preparations
Contrasting with Brined Olives
Distinguish between lacto-fermented olives and their brined counterparts, exploring how fermentation creates a unique sensory experience.
Nutritional Differences
Examine the nutritional disparities between lacto-fermented olives and other preparation methods, making an informed choice for your dietary preferences.
Taste Distinctions
Savor the nuanced flavors that set lacto-fermented olives apart, understanding why these probiotic-rich treats stand out on the palate.
DIY Lacto-fermentation Tips
Best Practices for Home Fermentation
Master the art of home fermentation with expert tips on creating a conducive environment for lacto-fermentation success.
Troubleshooting Common Issues
Navigate common pitfalls in the fermentation journey, ensuring that your olives emerge delectable and safe to enjoy.
Safety Precautions
Prioritize safety with essential precautions, guaranteeing a seamless and worry-free lacto-fermentation experience.
Cultural Significance
Lacto-fermented Olives in Various Cuisines
Explore the diverse ways different cultures incorporate lacto-fermented olives into their culinary traditions, adding a global perspective to your plate.
Traditional Uses in Different Cultures
Uncover the age-old traditions that center around lacto-fermented olives, discovering the cultural significance behind this timeless practice.
Symbolism and Rituals
Beyond the plate, learn about the symbolic and ritualistic aspects associated with lacto-fermented olives in various cultures.
Sustainability in Olive Fermentation
Eco-friendly Aspects of Lacto-fermentation
Discover how choosing lacto-fermented olives aligns with sustainable practices, contributing to a healthier planet.
Reducing Food Waste
Explore the impact of lacto-fermentation in reducing food waste, aligning your culinary choices with environmental consciousness.
Impact on the Environment
Delve into the broader implications of choosing lacto-fermented olives, understanding how this simple culinary choice can make a positive impact on the environment.
Expert Opinions
Insights from Chefs and Nutritionists
Gain valuable insights from culinary experts and nutritionists, understanding the professional perspective on the benefits and flavors of lacto-fermented olives.
Testimonials from Individuals
Hear firsthand accounts from individuals who have embraced lacto-fermented olives, sharing their experiences and tips for integrating this probiotic delight into daily life.
Expert Recommendations and Tips
Access expert recommendations and tips to enhance your lacto-fermentation journey, ensuring optimal flavor and health benefits.
Read Also: Amazing Fermented Giardiniera
Lacto-fermented Olives in Popular Culture
References in Literature and Media
Explore how lacto-fermented olives have made their mark in literature and media, becoming a symbol of culinary sophistication.
Popularity in the Food Industry
Witness the rise of lacto-fermented olives in the food industry, as chefs and food enthusiasts increasingly recognize the unique qualities of these fermented delights.
Trending Recipes and Social Media Influence
Stay abreast of the latest trends in lacto-fermented olive recipes, with social media platforms amplifying the popularity of this ancient culinary practice.
Exploring Side Effects and Allergies
Potential Side Effects
Understand the potential side effects of consuming lacto-fermented olives, ensuring that you can enjoy them without any adverse reactions.
Allergic Reactions and Precautions
Learn about potential allergic reactions and take necessary precautions, promoting a safe and enjoyable experience with lacto-fermented olives.
Consulting Healthcare Professionals
When in doubt, consult healthcare professionals to ensure that lacto-fermented olives align with your individual health needs.
Conclusion
In conclusion, exploring the world of lacto-fermented olives is not just a culinary journey but a holistic experience. From the historical roots to the modern kitchen, these probiotic-packed delicacies offer a delightful blend of tradition and innovation. Embrace the simplicity of home fermentation, savor the unique flavors, and contribute to a healthier planet with each delicious bite.
FAQ
Yes, when prepared and stored properly, lacto-fermented olives are safe to eat. The fermentation process creates an environment that discourages harmful bacteria.
While some basic kitchen tools are recommended, you can certainly lacto-ferment olives at home without specialized equipment. A clean jar, fresh olives, salt, and water are the essentials.
The fermentation process typically takes a few weeks. However, factors such as temperature and olive variety can influence the duration. Patience is key for optimal flavor development.
Individuals with specific health conditions, especially those related to sodium intake or probiotic consumption, should consult their healthcare professionals before incorporating lacto-fermented olives into their diet.