
The great thing about fermenting foods is that it opens you up to a wide array of foods that you probably wouldn’t try otherwise. In this post, Sarah makes something that sounds much unlike food to me, sound appetizing. Read on and discover how to make fermented grape leaves.
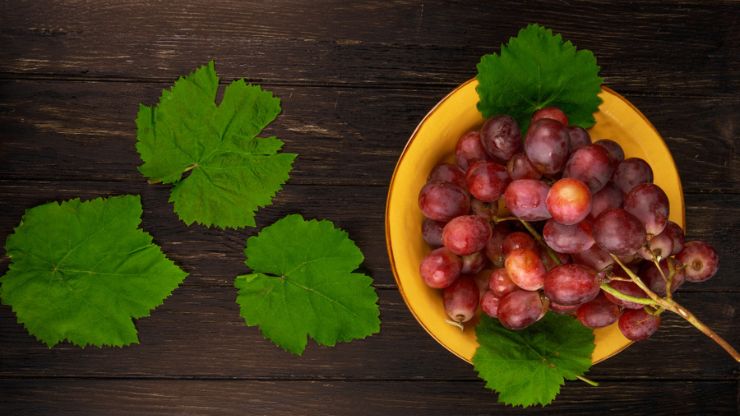
Grape leaves, that seems to be a slightly funny thing to ferment, isn’t it? But, fermented, or pickled, grape leaves can be very useful for dolmades, also known as dolmas. These are a traditional dish made with fermented grape leaves stuffed with a variety of fillings. In colder climates, the grape leaves will be smaller and about the right size for an appetizer tray, while in warmer climates the larger grape leaves would be suitable for a dinner-sized portion.
While you can get canned grape leaves, it is much more fun to harvest and prepare your own. This way you can verify that the leaves are from healthy, and non-sprayed or treated plants.
Fermented Grape Leaves Recipe
Step 1: Selecting Fresh Grape Leaves
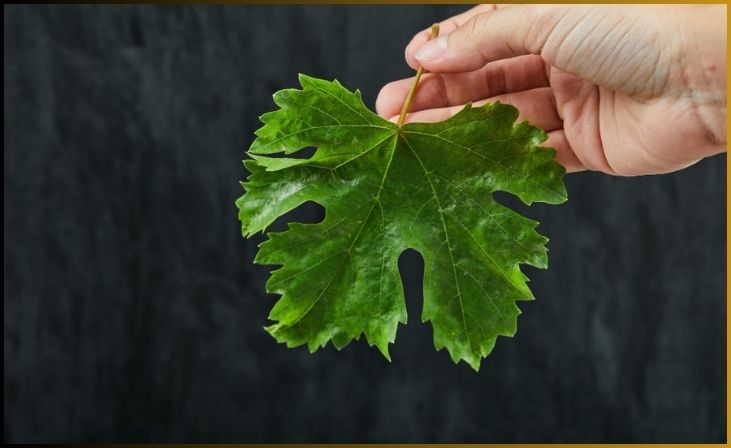
Choosing the right grape leaves is crucial for a successful fermentation process. Opt for young, tender leaves, preferably harvested in the spring when they are at their peak freshness. Look for leaves that are vibrant green, free from blemishes, and pliable to the touch. Avoid older leaves, as they may be tough and less suitable for fermentation.
If you have access to grapevines, consider picking leaves that are medium to large in size, making them easier to handle when it comes time to pack them into jars. Selecting fresh grape leaves sets the foundation for a flavorful and well-textured fermented product.
Step 2: Cleaning and Preparing Grape Leaves
Once you have gathered fresh grape leaves, the next step is to thoroughly clean and prepare them for fermentation. Begin by rinsing the leaves under cold, running water to remove any dirt, debris, or natural substances like sap. Gently pat them dry with a clean kitchen towel.
Inspect each leaf for signs of damage or discoloration, removing any imperfect ones. Trim the stems close to the leaf, ensuring a neat and uniform appearance. While doing this, be mindful not to tear or bruise the leaves, as their integrity contributes to a successful fermentation process.
Cleaning and preparing the grape leaves meticulously sets the stage for a hygienic and visually appealing end product. This step ensures that your fermented grape leaves will have a clean, crisp texture and a vibrant, appetizing appearance.
For More- How to Make Fermented Coleslaw
Step 3: Crafting the Brine
Creating a well-balanced brine is a critical aspect of fermenting grape leaves. Begin by dissolving sea salt in water, maintaining a ratio of about 1 to 2 tablespoons of salt per quart of water. Ensure the salt is fully dissolved to guarantee an even distribution throughout the brine.
The brine serves multiple purposes in the fermentation process. Not only does it act as a preservative, inhibiting the growth of undesirable bacteria, but it also imparts essential flavors to the grape leaves. The salt helps draw out moisture from the leaves, contributing to the development of a unique texture and taste during fermentation.
Crafting the brine accurately is a key step in creating a conducive environment for the beneficial lactic acid bacteria to thrive, resulting in deliciously fermented grape leaves.
Step 4: Adding Flavor (Optional)
Elevate the taste profile of your fermented grape leaves by introducing additional flavors through herbs, spices, and aromatics. This step is optional but provides an opportunity to customize the final product to suit your preferences.
Consider incorporating ingredients like garlic cloves, peppercorns, coriander seeds, or dill for a burst of complementary flavors. Experiment with different combinations to achieve a unique and personalized taste. The added spices not only contribute to the overall flavor complexity but also infuse the grape leaves with enticing aromas during fermentation.
Adding flavor at this stage allows you to tailor the fermented grape leaves to your culinary preferences, resulting in a delightful and nuanced taste experience.
Step 5: Packing the Jars
Once you’ve crafted the brine and infused your grape leaves with optional flavors, it’s time to pack them into jars for the fermentation process. Begin by neatly stacking the prepared grape leaves into clean, sterilized jars. Ensure the leaves are tightly packed but not overly compressed, allowing room for the fermentation process to occur.
Position the grape leaves in the jars with the vein side facing down, creating a visually appealing arrangement. While packing, be mindful of leaving some headspace at the top of the jar to accommodate any expansion during fermentation.
Properly packing the jars sets the stage for a successful fermentation, as it helps maintain the shape and integrity of the grape leaves while allowing the beneficial bacteria to work their magic.
Step 6: Using Fermentation Weights
To ensure an effective fermentation process and keep the grape leaves submerged in the brine, employ fermentation weights. These weights play a crucial role in preventing the leaves from floating to the surface, where exposure to air could lead to spoilage.
You can use specifically designed glass weights or clean stones that fit inside the mouth of the jar. Gently place the weights on top of the grape leaves, ensuring they are fully immersed in the brine. This not only encourages the proper development of flavors but also creates an anaerobic environment that favors the growth of beneficial lactic acid bacteria.
Using fermentation weights is a practical measure to promote uniform fermentation and enhance the overall quality of your fermented grape leaves.
Step 7: Covering with Cloth
After placing the fermentation weights and ensuring the grape leaves are fully submerged, cover the mouth of each jar with a breathable material such as cheesecloth or a coffee filter. Secure the covering with rubber bands or string, allowing gases produced during fermentation to escape while preventing contaminants from entering.
Covering the jars with a breathable cloth is essential to creating an aerobic environment for the fermentation process. This step promotes the growth of beneficial bacteria while protecting the grape leaves from potential spoilage. It also allows you to monitor the fermentation progress and adjust as needed.
Step 8: Fermentation Time
Place the covered jars in a cool, dark location to initiate the fermentation process. The duration of fermentation can vary based on factors such as ambient temperature and desired flavor intensity. Generally, fermenting grape leaves may take anywhere from a few weeks to a couple of months.
Throughout this period, the beneficial bacteria present in the brine will work their transformative magic, imparting a distinct tanginess and enhancing the overall flavor profile of the grape leaves. Regularly check the jars, ensuring the grape leaves remain submerged and adjusting the covering as needed.
Patience is key during fermentation. Allow the natural processes to unfold, and regularly taste-test the grape leaves to determine when they have reached your desired level of flavor development.
Step 9: Taste Testing and Refrigeration

Once the fermentation period is complete and your grape leaves have developed the desired tanginess, it’s time for the crucial taste test. Sample a leaf to ensure it meets your flavor expectations. If satisfied, proceed to the final steps.
To slow down the fermentation process and preserve the fermented grape leaves, transfer the jars to the refrigerator. This cooling step not only extends the shelf life but also allows you to enjoy the deliciously fermented grape leaves at your own pace.
Remember, refrigeration doesn’t halt fermentation entirely; it merely slows it down. Your fermented grape leaves will continue to mature, so feel free to savor them over an extended period, appreciating the nuanced flavors that develop over time.
Also Read- How to Make Fermented Celery
Conclusion
Fermenting grape leaves is a rewarding culinary endeavor that brings a burst of flavor and a dose of probiotics to your table. Whether enjoyed on their own or incorporated into various dishes, these fermented grape leaves are sure to add a unique and tangy twist to your culinary repertoire. Experiment with different herbs and spices to tailor the taste to your liking, and relish the delicious results of your fermentation journey.
FAQs
Fermentation time can vary, but on average, it takes around 2 to 4 weeks. Factors such as temperature and personal taste preferences can influence the duration.
While fresh, young leaves are preferred, you can experiment with store-bought grape leaves. Ensure they are free from preservatives, and if they’re preserved in brine, adjust the salt content in your fermentation accordingly.
Non-iodized sea salt or pickling salt is recommended for creating the brine. Iodine in table salt may inhibit the fermentation process.